|
MATERIALS: |
|
· Cardboard · Silver Colored Sheet (or any silver sheet enough to reflect object clearly) · Film Case · Clear Marble (14-18mm diameter) · Cellophane Tape · Glue · Scissors · Cutter · Ruler |
|
PROCEDURE: |


|
Taking it further |
|
1. Try to make another shape such as square, trapezoid etc and see what will happen. Can we use circular kaleidoscope? You can also try to change the length of the kaleidoscope. 2. Tell the students to replace the clear marble by another object such as clear plastic cover or clear glass or change the color of the marble. |
|
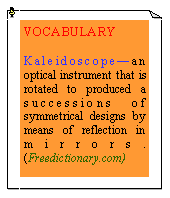
SIMPLE KALEIDOSCOPE |

|
1. Cut the cardboard to 15 cm long and 7.5 cm wide. Divide it into three parts, 2.5 cm wide each as shown in the photo. Glue the silver colored sheet at the back of the cardboard. |


|
2. Slightly run a cutter on each line so that it will be easier to fold. Fold the cardboard so it will form triangular cylinder. Make sure that the silver portion is inside the triangle. Seal the triangle with cellophane tape. Set aside. |


|
3. Get the film case. Make a hole at the bottom portion of the film case with the same diameter as the clear marble using the cutter.
4. Glue the clear marble on the hole of the film case. |


|
5. Insert the triangular cardboard with silver sheet on the film case. You have now simple kaleidoscope. Try it on the object around you. |

|
The view inside the kaleidoscope when it is focused in an object. Try rotating the kaleidoscope. |


